I’m leaving Trifork to start working on Snapsale at Skylib. I will be taking over their iOS code base. I’ve taken over maintenance of many codebases before, and I thought it was time to describe my process.
I have two goals for this process:
This piece is a bit lengthy, and I’m not saying I’ll need to do it all on Skylibs code, nor should this be seen as a fixed guide to any project. I do recommend following the same steps for anyone taking over code that I have maintained at Trifork, so it is also not meant to be any judgement. It is simply a description of my current process for accomplishing these two goals. With that said, let’s go through the steps:
Step #1, the most important step, is to gather a list of features and use-cases, so I understand what the app does. So far I have never been able to complete this step, I always come back to add to this list later, and I really wish I could become better at this step. It really helps every step going forward.
Step #2, does it compile? Very often it does not. It depends on something installed on the developers computer he or she took for granted (hello protobuf), not everything was committed because of a too loose .gitignore file, or the project simply hasn’t been maintained for long because the customer was happy with it being in the store and did not want any expenses maintaining it without there being a “fire” or a new business-critical feature
Step #3, run and read all the tests. Do the tests cover the list from step #1? If so, I am forever in the debt of the author I have taken the project over from and he or she is now my personal hero. And I’m happy to say I have a few of these heros.
Step #4, get the certificates and accompanying private- and public keys and put them in a separate keychain file (without a password) that I’ll commit to the repo. If you have been granted access to the repo, I’ll want you to have this information.
Step #5, are there any build scripts? If so, do they run? Do they work? I’m no wizard at reading shell scripts, but I need to understand what’s going on during my build.
Step #6, is there a build server? If so, make sure I have access to it and that I can trigger a build and understand the process of what is happening to it.
At this point, I have gotten to know the project a bit, and I know what makes it tick. Now I will begin pruning away what I don’t think belongs in the project and improve on the code, in order to improve maintainability. It being more maintainable will help me understand the code more in-depth later. So let’s get at it!
Step #7, take control of dependencies. All too often I get a .xcodeproj with a lot of external code and libraries thrown in and hacked together into the build. This is no way to live! If I’m lucky enough to be able to talk to the original author, more often than not I get the line “I used to be a Java developer, and I got stuck in Maven hell”. I feel for you, bro, but this is not Java, and managing dependencies does not mean downloading the internet Maven style. And doing it by hand is probably not managing the at all.
CococaPods is great for managing dependencies. So I will gather a list of the dependencies, and write the list of them in a Podfile. Then I will use CocoaPods to manage these dependencies and remove them from the .xcodeproj. Usually the dependencies that were there are embarrassingly out of date, often exposing know security holes or just not supported any more by their service providers. Yes, I’m looking at you, AFNetworking, Facebook, Flurry and Fabric. So I will try updating them all to the latest version and see if it compiles with only minor modifications. If it does, great. If not, I’ll evaluate whether I should back down a couple of versions, or whether I should accept that the app is now broken and work to fix that. And even if they work, I’ll need to compare it to what was in the release we had at step #6 to see if this has given unintended consequences. If it has, back down to the original versions (although still in CocoaPods) and make a ticket for upgrading these in the task management system I use.
Yes, I will check in the Pods directory into the repo. I want to be able to check out the repo and have it compiled on any Mac with Xcode installed - I don’t want to depend on neither CocoaPods nor the internet.
CocoaPods is great at compiling a list of acknowledgements in either plist or markdown format. Too often these are not reflected in the app, so I’ll make a ticket to include them, either in an About page or in the Settings bundle.
Finally, if Core Data is a dependency, I will usually add mogenerator and Magical Record - my go-to tools for making Core Data easy to handle and maintainable. And yes, I’ll include the Mogenerator binaries in the repo.
Step #8 is cleaning up the Xcode project and git repo further. I’ll remove any accidentally committed userdata, .DS_Store files, .bak files and other temporary files. I’ll add entries in the .gitignore file so they don’t reappear.
I’ll remove code that has been commented out. If I’ll ever need it (probably not), it is in the repo and I can look it up there.
I’ll turn TODOs, FIXMEs and the like into warnings. If it’s an all Objective-C codebase, I’ll turn them into #warnings, if there is Swift in the project I have a little script that will turn these into warnings at build time.
Lately I’ve explored having a scheme that will build with the latest SDK as a project that will only run on the latest iOS version. I’ll run this on a build server, and this will make any deprecated methods or constants light up, so that I can be sure not to use them anymore.
Step #9, readable code. I’m sure the code you write is consistent and easily readable. While that is my goal too, it is hard to be consistent. But code is written to be read, and having a high degree of consistency and low variability accross projects makes for an easier read. That’s why I love Uncrustify. Uncrustify will take a config file of how the code should be formatted and apply that. This means that all code will read the same, making me only having to read what is actually going on in the code, instead of parsing different syntax from code to code.
But Uncrustify can’t do it all. So after that I’ll go through the ivars and make sure they have an underscore as a prefix, just like we’ve been taught. It makes it really easy to see what are ivars, without having to resolve to workarounds such as prefixing them with self->. At the moment this is the only task I’ll take out AppCode for. I probably should spend more time with AppCode and find other areas for it, but for now, this is where it shines in my toolbelt.
Step #10 is reducing the number of targets. Targets are high-maintenance. They drift apart and have buckets and buckets of options. Chances are you only want every few of those options to diverge. This is why I prefer configurations and schemes instead. If there is some variability I cannot fit into this, I’ll use my PreBuild tool, and with this in hand I’ve been able to deliver many apps that share a code-base but diverge in both features, looks, app store details and languages. The benefit is that this is just configuration, expressed as JSON, and thus easily followed over time in the git repo. In contrast to your project.pbxproj.
Step #11 is grouping functions belonging to a protocol together. For each Objective C class, I’ll run use #pragma mark for each protocol, and for Swift I’ll use class extensions.
Step #12, while grouping functions, this is a great time to remove dead code, meaning code that has been commented out, that can never be reached or which isn’t included in the compile.
Step #13, another thing that I’ll do at this time is looking at the class interfaces and see if only what should be public is public, and possibly refactor parts into a protocol. Then I can begin writing missing tests to ensure that I’ve understood the code correctly.
This step is one of those usually-never-complete steps, and I’m not going to be too rigorous about it. If I can devote a week or two in a medium sized project, this is usually well worth the effort. It’ll increase my knowledge of the code base, and reduce technical debt at the same time
Step #14, understanding how State is managed in the app. Usually this is too intertwined in the code to reasonably be done anything about, but at least I should understand it. Then as I write new code, I’ll probably transform it slowly and try to bring those changes back to the old code. If there is one thing I’m really holding my fingers crossed for when entering a new project, it is good state management. And to be perfectly honest, I haven’t quite figured out what that is myself yet. But I’m confident that I’m on a good path.
Step #15, warnings. Another thing that is good doing at this stage is fixing all those warnings that either were in the project already, or that cropped up because of TODOs and FIXMEs. Also, rigorously running build & analyze probably yields interesting code paths. And finally, run instruments to check for leaks and other memory buildup, high CPU or GPU usage, and framerates dropping below 60 FPS on the target devices.
Step #16, dependency injection. Scary word? Not really, it’s just creating properties that can be populated by whoever creates an object, and that will be used instead of the singletons that too often litter an iOS project. This is usually counted as minutes per class, and makes the classes so much more testable.
Step #17, when refactoring, if there is no logging framework beyond print() in Swift and NSLog() in Objective-C, I’ll probably include CocoaLumberjack. Also, if there is an analytics library, I’ll probably add the ARAnalytics wrapper so that it is easy to add another one if it provides interesting metrics and services. My current gang is Flurry and Fabric.
Step #18, move graphics into asset catalogs, and make sure all the graphics are there. Way to often there is just the @2x.png file, which of course is no good as it’ll slow down slow non-retina devices, and look blurry on @3x devices. More often than not I will ask the designers to re-create all the files as PDFs, and use them in the asset catalogs and have Xcode create PNGs for the different resolutions.
Finally, step #19, is to move code into components. There are three parts to this: if there are any parts (usually custom controls) that can be moved into a CocoaPod, this should be done at once. I’m not saying it has to be open sourced, having an in-house repo is just fine.
Then the code that can be shared between extensions and apps for other platforms such as Apple Watch or OS X should be moved into a framework.
At last I’ll move the rest of my app code into a framework. I do this so that I can import it into a Playground and use the Playground to work with views and animations instead of having to do compile-and-run to show a proof-of-concept or navigate to the place in the code where it is being used. This should make me more efficient when working together with the designer.
Wow, that was a lot of steps, and a lot of important work to do. Some may be redundant because it has already been done, others may be deprioritized because of project constraints. Sometimes it is fine incurring more technical debt in order to get to market. But if I get to do it my way, this is what I will do - and I’m sure I’ll have a better understanding of the project, and a more flexible project for it. Which means being able to more reliably deliver those new features and versions month after month.
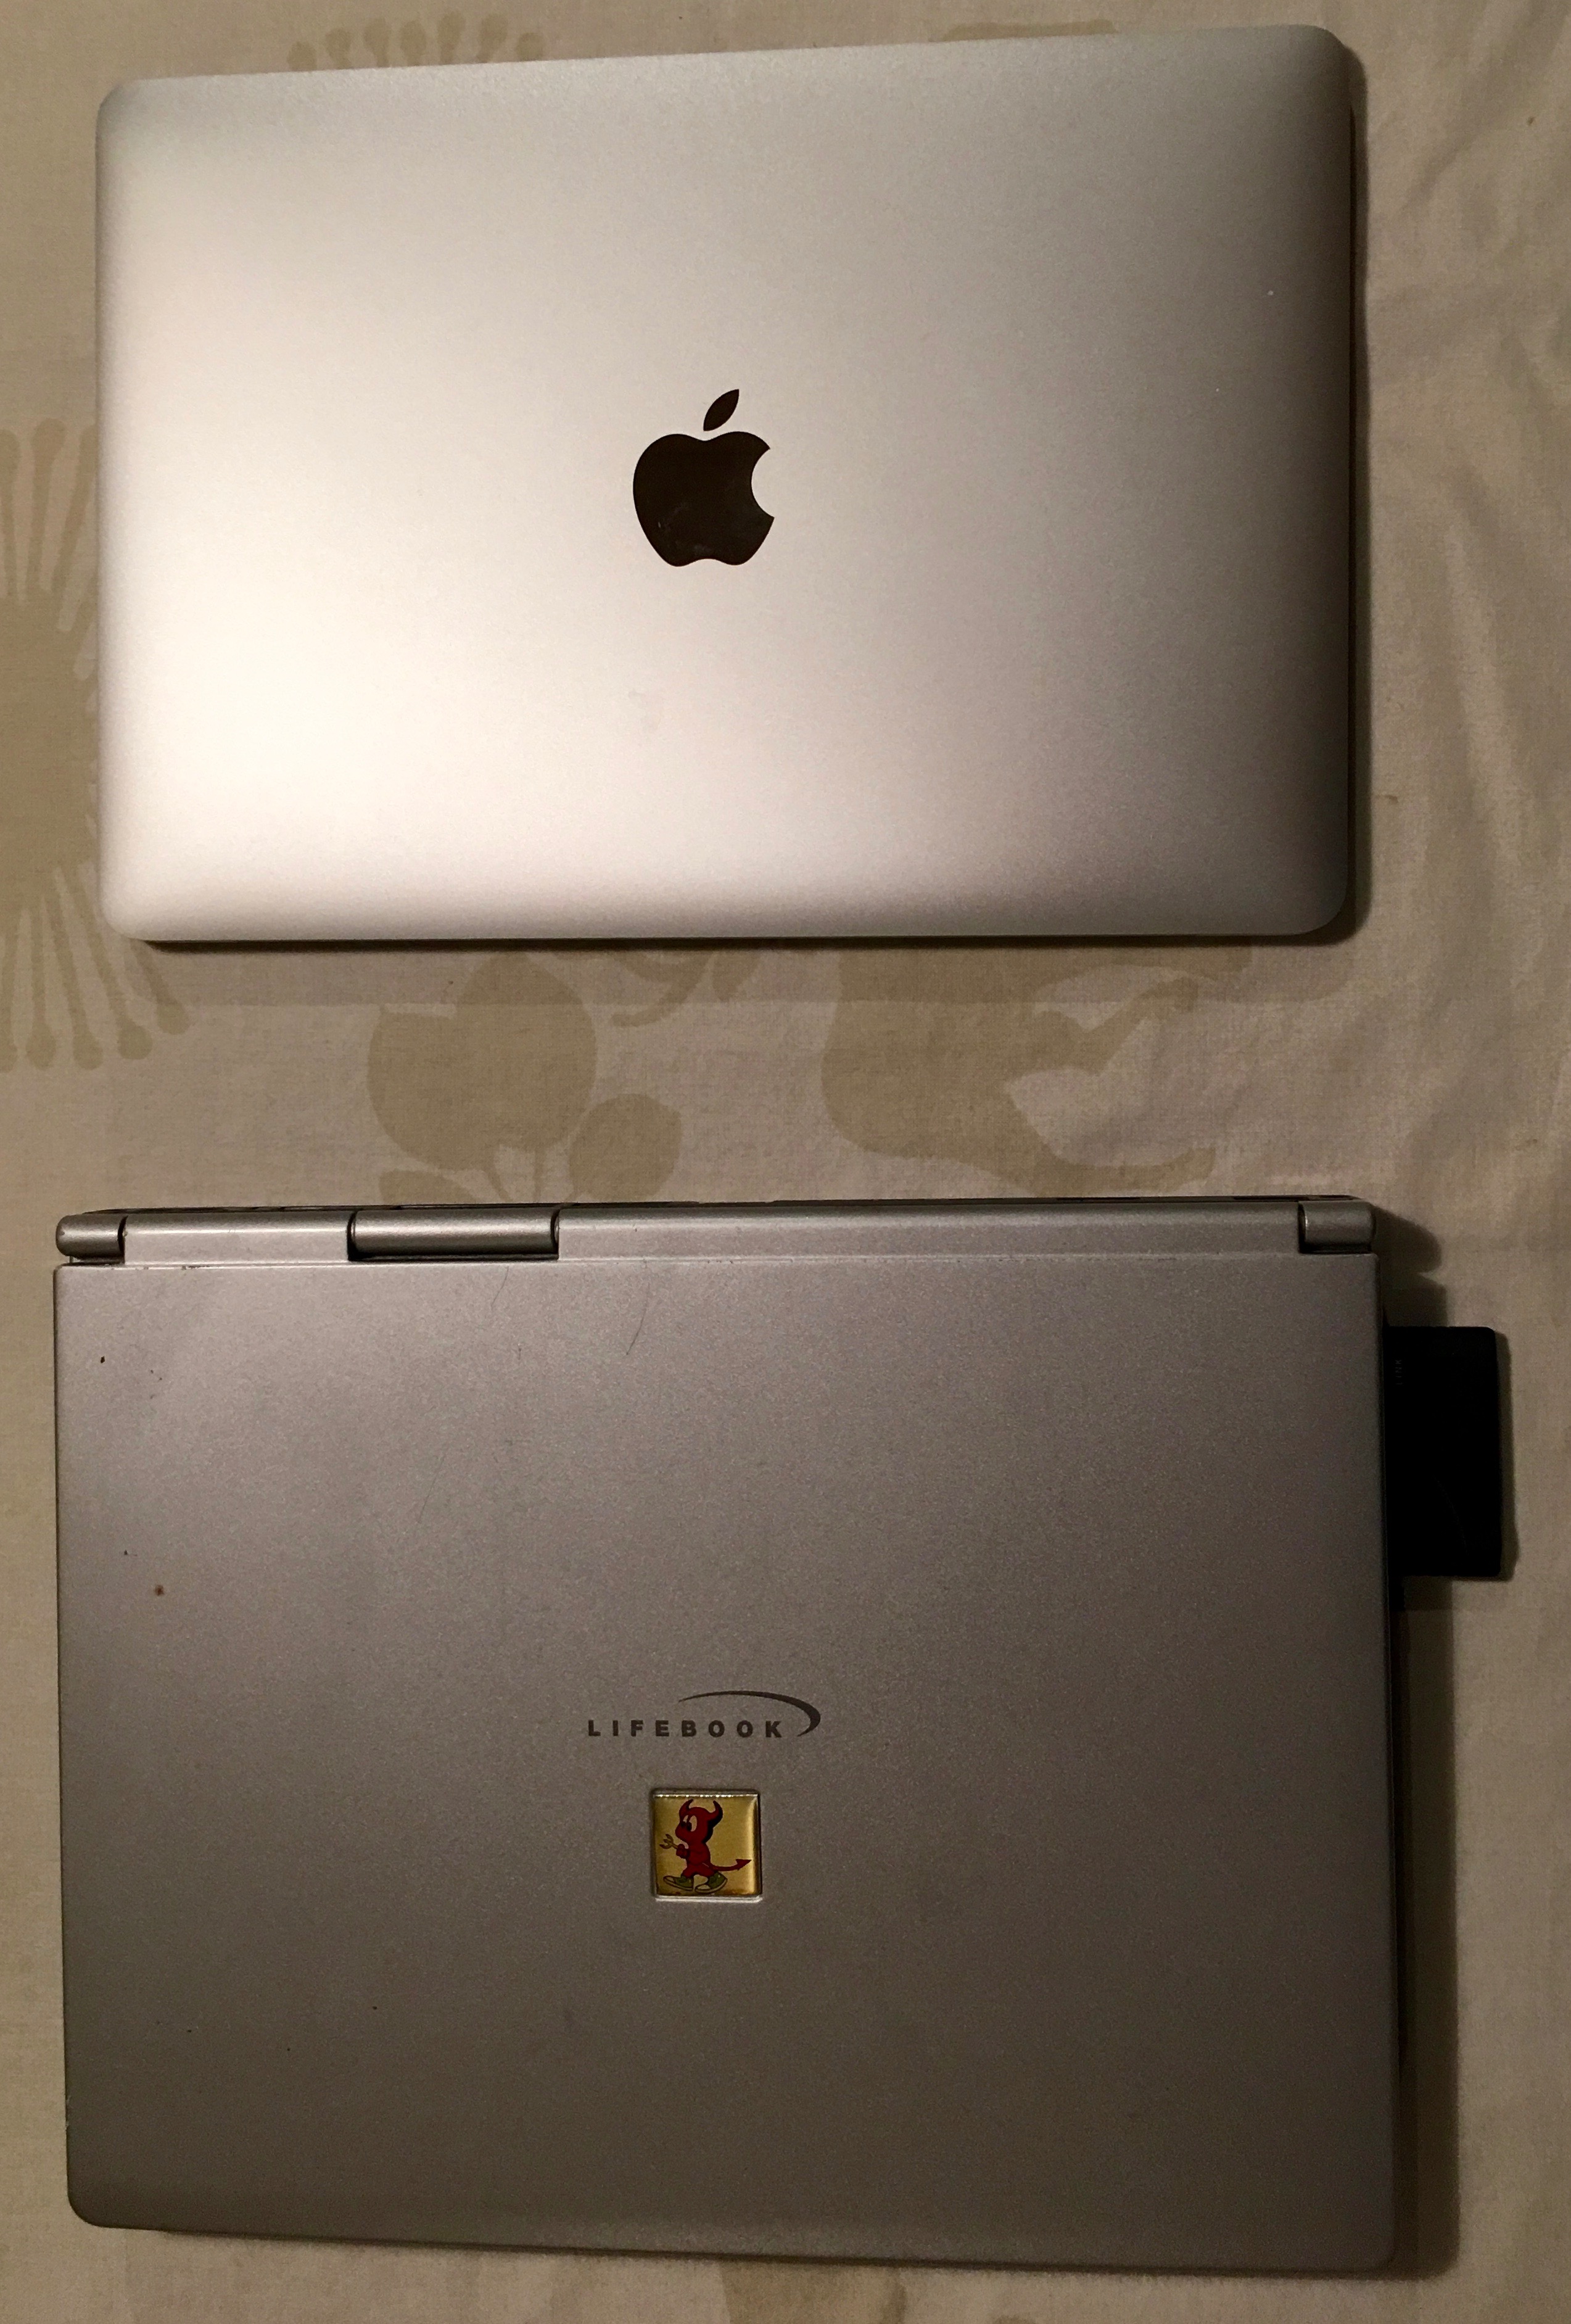
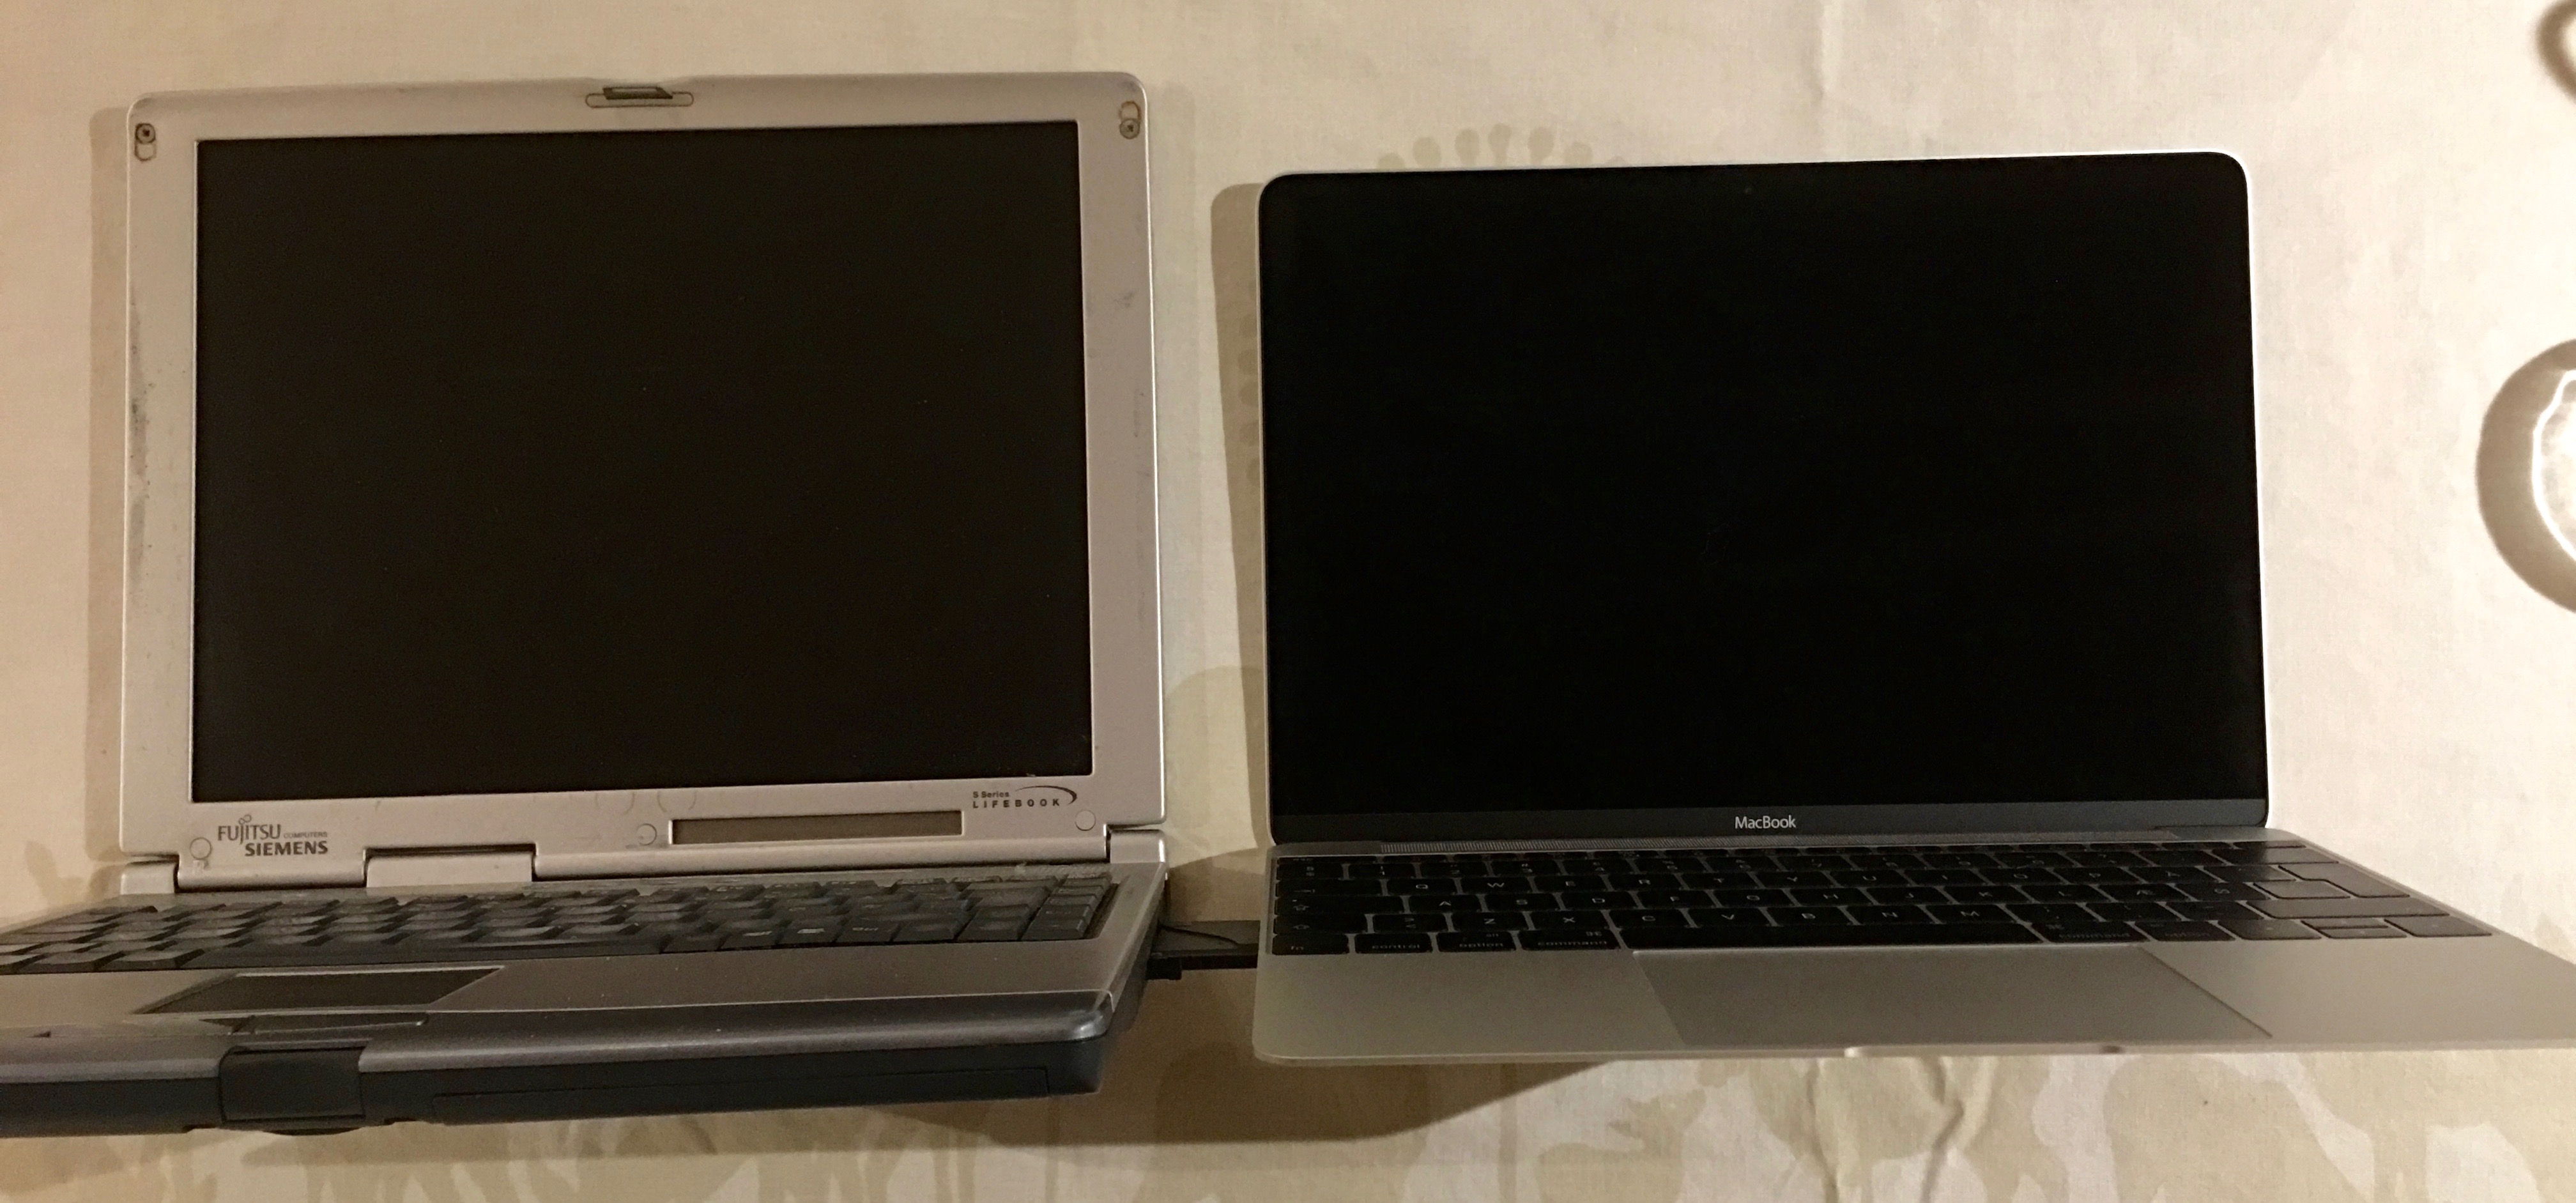
I’m setting up my travel computer for work, the retina Macbook, spring 2015 base model. It’ll be my travel Xcode companion. It’s the first 12” laptop I use since the one I Fujitsu-Siemens I bought in 2000 before travelling to Australia. The Fujitsu-Siemens was an ultra-portable Lifebook S-4510, by far slimmer than the average laptop of its time - I knew no-one who had a slimmer one for years. So I thought it was time to compare dimensions. And, well, this laptop was thinner in my memory than sitting side-by-side the Macbook

Live Photos is one of the most interesting new features of the iPhone. The iPhone is the most used camera I have, because it is always with me. And until now I have been quite all right at taking the photos I want. Live photos adds a time dimension to my photos, and this means I have to re-learn what it is to compose a photo, what it is to frame a photo, what it is to shoot a photo.
Right of the bat, the first thing I wanted was to bring a tripod with me. Because even though I could capture the movement in the situation, I actually caught a lot of movement in my hand. And this is on the iPhone 6S Plus that has image stabilization. Obviously I’m not going to carry a tripod around, but it means I have to re-learn how to hold the iPhone while shooting a photo.
Apple proposed that this feature gives context to the photos, but the fact it can be used for a lock screen and as a Watch face means that the entire live photo is your composition, not just a photo with context. I think I’ll read a bit up on how people shoot short video clips to get a couple of pointers for framing and composition.
So, time to learn more photography
Today my new iPhone arrived. Upgrade time!
First failure - don’t back up to iCloud, it’ll take forever. Back up to your Mac. Remember what Mac it is you back up to. And enable backup encryption. Because if you don’t, it’ll forget all your health data and all your passwords, and apparently also apps that require encryption. News to me.
Before this, though, unpair the Apple Watch from the phone. Because, it turns out that this is the only way to back it up.
So by unpairing (it takes about 5 minutes) you get a backup on your phone. Then you can backup your phone to a Mac, remembering to have it an encrypted backup, and THEN you can restore your old phone on the new, and only have half the apps be gone for no good reason.
Now you’re just a confused panda, compared to the sad panda you’d be if you did it any other way.
Did I mention that the process around switching iPhones really needs improving? Apple engineers, I would expect you guys are doing this three times a day. Why is this not worked through? Let me just set up the new phone with a nod to the old phone, have all my info moved over securely, including the Apple Watch pairing and pairing with all other devices, and then have the old phone know it is now only a backup until at some point it is cleared out?
It’s now been four working days since the treadmill arrived, and it’s time to go through my first impressions.
This treadmill is heavy! Delivery didn’t go as smooth as I had expected, the delivery guy placed it in front of the wrong side of the building and never called me to ask where to deliver it, so I had to carry it through the building and up some stairs together with a co-worker. That was some real exercise! But on the other hand, that also means it is very, very stable. I have not have it move accidentally even a millimeter.
I do use it almost all the time. And it took no time getting used to working this way, even though I had expected it would take some getting used to. I find it easy to focus and consentrate on the task at hand. It does make it more obvious to me those little breaks I take when getting water, coffee, or going to the bathroom, because I have to pause it first.
The treadmill comes with a dashboard that should be mounted under the desk, close to my belly. I found that weird, and even though that means I can’t use the safety release strap, I have placed it on my desk, just in arms reach. With an average speed of 2.6 km/h I think I’ll be fine safety-wise. :-)
I had set a goal of 15.000 steps a day. I thought that was ambitious, but I find I should be able to up that to 21.000 steps a day. My goal of 12 km a day is still a stretch goal. In actual fact I’ve been going more like 7 km/day. So that reveals two insights: I take smaller steps when walking on the treadmill than when I walk outside. And, I don’t get 6 hours of walking a day. I haven’t yet figured out where the rest of the time goes, and I expect to get back to that later.
I was not prepared for how loud this treadmill is. It is really noisy when I walk on it. Noisy enough to annoy my collegues. So I’m better at closing my door, and if I forget or need to get fresh air in, they will close theirs. I find I can ignore it quickly enough, but I’m not sure if this will be a problem long-term. However, this is not a good thing for close cooperation.
A treadmill is also really not good for pair programming, even when it’s turned off. It’s in the way. This can be solved easily enough by using the other persons computer, but that just means that not everyone can use a treadmill, or there will have to be treadmill-free zones where we can bring laptops to pair. More frustrating is when I quickly want to show something to a collegue. It’s like asking them up on a podium, and I’ll quickly climb down to let them have the space. But it’s absolutely odd. Also, when someone comes in to chat I prefer to climb down to be at an even level as the other - the extra height of the treadmill really makes it feel like you’re standing on a podium.
What I did not expect is that I build up a little bit of a sweat. But hey, it’s still early days and I’m experimenting with finding a speed that is comfortable - not to slow but not something that’ll make me sweat either.
The only basic treadmill functionality I was very surprised not to find, was walking at an angle. I wanted to set it to a 10 degrees climb, thus walking uphill. When I couldn’t find out how I should set that, I contacted my supplier, who told me that it could not do this. As far as I understand, tilting it manually is not recommended and could reduce its lifespan. So no climbs or descents for me, even though I have never seen a treadmill that does not provide this.
So apart from being limited to a 0 degrees climb, the basic treadmill functionality is good, and I’m happy with it. I must say that I really enjoy using it, and look forward to coming to the office, and going for a walk. The main drawback, apart from the noise that makes me isolate myself a bit, is all the bad puns I come up with during the day.
Now, what I’m not happy with is the extra-functionality that it provides: Bluetooth pedometer. I hit Bluetooth pairing and asked my iPhone to pair with it. The iPhone said no thank you! Really!? I mean, this is 2015, it is a really expensive device, and its makers haven’t bothered either getting the MFi certification for it, or adding BLE to it and have it comply with a basic service such as the pedometer service? That is crazy! So what they want me to do is pair the treadmill with my Mac, download and run a separate application that will take the input and upload it to a “customer club”. It duplicates some basic stats that the treadmill display are already showing, and for more basic information (such as how long have I been using the treadmill for today? How many steps have I made? What distance have I walked?) I have to press a button to be taken to a website. I don’t want a website. I want the information to be captured and entered into my Health app, the Health app that has come together with every iPhone for quite a while now, and where all my other health related information from my iPhone, from the BLE heartrate monitor and my Apple Watch are gathered. But alas, all LifeSpan can tell me is that an app is coming later this year. I asked my vendor if that means the console will have to be updated, since it doesn’t pair with my iPhone, but he assured me that it will work with my existing console. I wonder how that’ll work, and will be sure to write a review after it has arrived.
But this issue with the Health app integration has me wondering - how does it work when multiple sources track the same data? I already wear my Apple Watch, and it tracks my steps. So does my iPhone when it’s in my pocket, and I’m sure they coordinate fine. But when I’m on the treadmill, my hands are resting on the desk and my iPhone is connected to my Mac on the desk. So the only thing tracking my steps is the treadmill. That is, until there is something I need to read. As a developer, I read an awful lot during the day. Especially code. And for that I may fold my arms, leading the Apple Watch to start tracking my steps. Now there are two sources tracking my steps. How would they figure out when they overlap? I don’t want to say that during office hours, only use the data from the treadmill, because I’d like to count the steps to and from the coffee machine as well. So how these would integrate, or how it already now integrates with all kinds of devices that count steps, is a mystery to me at the moment.
Settings on the treadmill are horrible. I knew I could go into settings to turn of the beeping when I press a button and to have it start at the speed I had last set it to. But settings was a set of options that were called F001 to F021. More than half of them were undocumented, and some options were 0 or 1, in the case of setting it to English or Metric, they were En or Si. What is Si? But the four out of 21 settings that were documented in the manual were fine: I got to turn off anoying beeping sound, set it to metric, make it remember the last speed I entered and don’t bother about the safety pin I didn’t see the reason for. I have no idea why all of this was not default. After I set it the first day, though, I did not have to set anything again.
In conclusion, I love the walking - much more than I expected I would. I look forward to walking tomorrow. The first day, I walked 15.000 steps and got used to the mode of work almost right away. I feel I’m doing something good for my body and for my health. And that is awesome, especially since I do it while getting my job done at least just as good as I used to. Cooperation around my desk will be affected, but I can work around that. And I’m hoping that lubricating the belt with a silicone spray as the manual suggests will reduce much of the noise. And finally, I can’t wait for an app that will integrate with the Health app.
Follow Me
Follow me online and join a conversation