I’m an iOS developer at Snapsale, and I spend some time on the road, either travelling to our main office in Oslo, or to conferences. For my out-of-office work, I chose the entry-level Macbook.
The specs were not very powerful: a 1,1Ghz dual-core Broadwell Core-M with 8GB of RAM and 256GB SSD. But then again my expectation was mainly to do meetings and notes, UI review and the occasional Xcode hacking. Thus I chose 12” to optimize for being able to “comfortably” work from the flight seat and the coach seat, and retina for working on UI together with our designer.
Optimizing for the screen is something I would not have expected to do five years ago, and I must admit to being a bit hesitant to how the Macbook would deal with Xcode. The answer is: surprisingly well. What I had not factored in was that the SSD is actually a quite fast SSD, and since development work is quite I/O intensive, that made a significant difference.
One of the big benefits of this Mac that is easily overlooked is no fans. I actually didn’t notice for the first couple of weeks until my colleagues Macbook Pro spun up to a whine. Of course, the worst part is that the CPU is not powerful enough to need those fans, but buying a Macbook, you should be very aware of this going in.
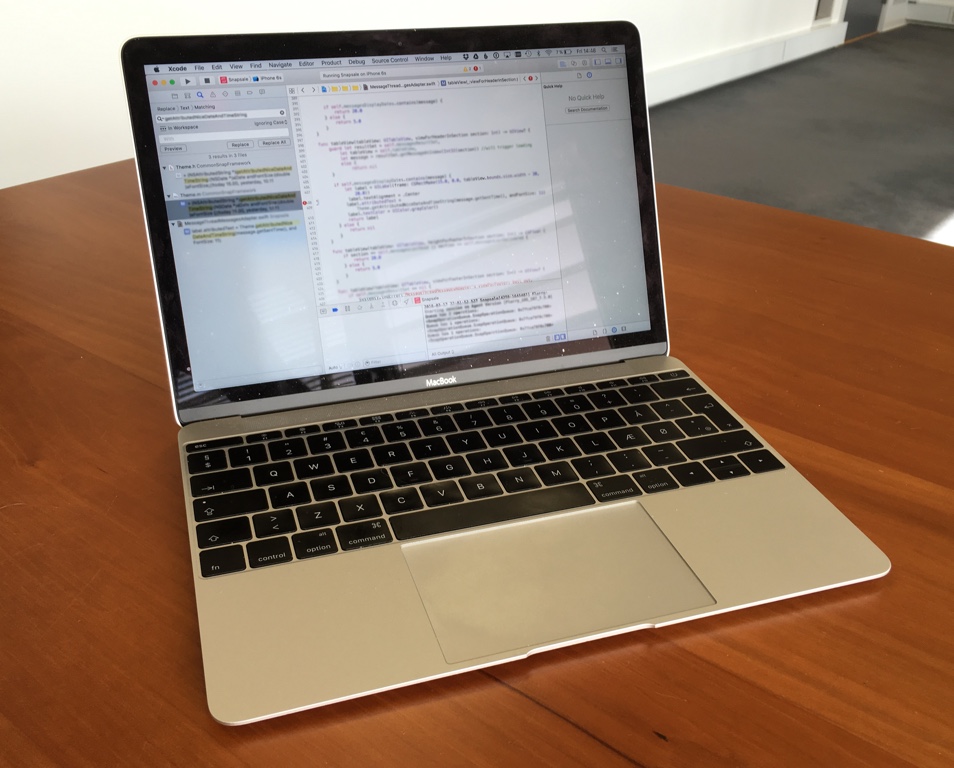
So how is the Macbook for Xcode? It’s decent: I’d say about half the speed of my Skylake iMac (2015 model). The amount of stuff on my screen is of course limited, but laptop development work usually has this drawback, and dealing with that is not hard.
So instead of only occasional Xcode work, I use it heavily for Xcode even when I’m not travelling: at home when I don’t want to go into my home office but be in the living room, and even in my office when I want to run another branch of the git repo in parallel.
With this in mind, I expect to be able to recommend a Skylake Macbook (the rumoured early 2016 model) as an all right Xcode environment.
November 2nd I started working at Snapsale as the head of iOS development. At the moment that means the head of me, so I get to do all the fun stuff myself. :-)
In that context I’m setting up an iOS test lab, that I’ve called “Snapsale iOS Lab” (yes, I’m that original in my naming). For my own sake, to remember with future devices, and to inspire other iOS developers (this might even apply to some degree to other mobile app devs), here is the list of tasks I do for each device.
When setting up a new iOS device:
I expect the last two steps can be automated through Fastlane.io, but I haven’t come around to that yet.
I also expect that many of these steps can be fast-forwarded by taking a backup with encryption enabled through iTunes on the test server and then restoring it onto the new device
For a project I’m doing at work, that I hope will eventually be open source, I needed to have protobuf compiled for iOS. A colleague of mine showed me how it had been compiled on iOS 4, using these scripts, but with iOS 5 I ended up with binaries compiled for the arm architecture instead of the armv7 architecture.
Be aware that the iOS 5 SDK actually ships with a version of protobuf, but it’s a bit old, being version 2003001. And it only ships the binary, not the headers.
To compile protobuf, grab the latest source (which is 2.4.1 at the time of writing this) and run the following script (download script):
After running this, you should have a directory called /tmp/protobuf/arm that is compiled for your iPhone or iPad with the armv7 architecture. Copy that into your project and start using protobuf ![]()
A Mini Server (two disks, no superdrive) became redundant in our setup, so I used it to test a few things. At the same time I needed Visual Studio, so I dedicated one of the drives to Windows 7. After installing it with bootcamp, the mini would reboot as Windows, but if I pressed option and selected OS X, and rebooted after having used OS X, I’d get a “no OS” flash and the mini would reboot, find no OS, reboot again and loop. If you ever get this problem, the fix is easy: Press the option key and select boot into OS X, then go to System Preferences, Startup disk, select your OS X disk, and press restart. It’ll now behave correctly and reboot into OS X at startup.
It’s been a while since I wrote about what I’m doing, but nothing much has changed: I’m working with the iPhone SDK making different applications. Today I’d like to demo the application that made me start working with the iPhone: DashBoard. I first got interested with dashboards when I tried to make something userfriendly with Performance Point and found IMA’s dashboard. Now I’ve created a simple, easily customizable dashboard for the iPhone. Because of Apple’s NDA I cannot release it, but I believe I can show it to you, running on the simulator:
In this video you see a logo on top and nine KPI buttons below. Each KPI button has a logo, a number, a unit, a last-updated date and a colour to indicate if it’s as it should be, falling below target or significantly below target (in other words, if there is a problem), using green, yellow and red. When you tap a KPI button, the report is displayed. The report is just a webpage, so I’ve linked up a webpage for every KPI button showing just a normal webpage, but more interestingly I think: PDF reports. As you can see, it works beautiful with 154 page reports, even though I guess for actually using this, you’d use a page or three with lots of graphs. ![]()
PS, yes, my conservatory exam preparations are going well ![]()
Follow Me
Follow me online and join a conversation